Take-Up Bearing Units: What They Are and How to Select UCT vs NAT vs UCST
A take-up bearing unit supports a shaft while allowing the housing to move along a frame or guide. That controlled movement is what makes the unit useful for setting conveyor-belt tension, compensating for stretch and positioning head or tail shafts without redesigning the bearing support.
The housing must match both the shaft and the take-up frame. Shaft bore, locking method, housing slide dimensions and required adjustment travel are therefore all part of the selection.
How a take-up unit differs from a fixed pillow block
A standard pillow block is bolted to a fixed base. A take-up housing has external guiding surfaces that fit a take-up frame, so the complete bearing position can move as the tensioning screw or adjustment mechanism is changed. The bearing insert still has to lock securely to the shaft while the housing slides in the frame.
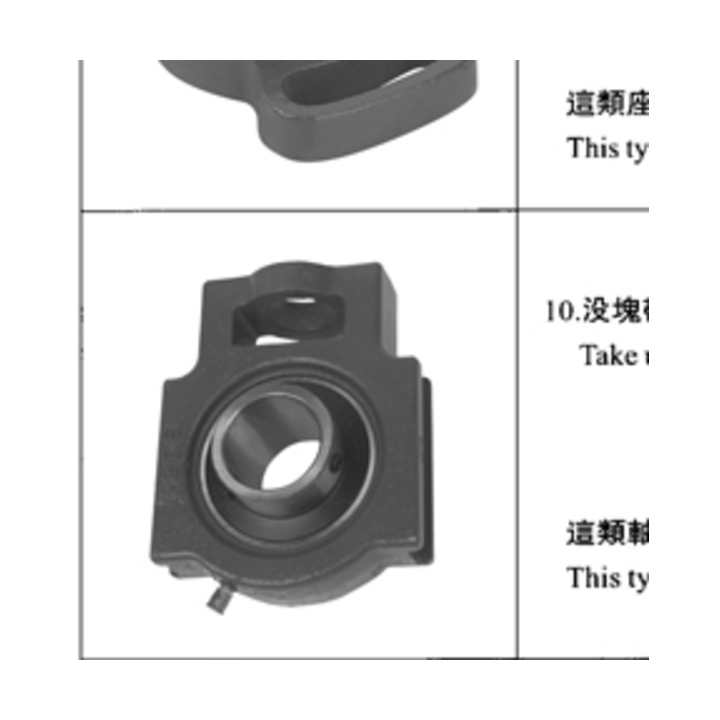
EP-UCT: set-screw take-up family
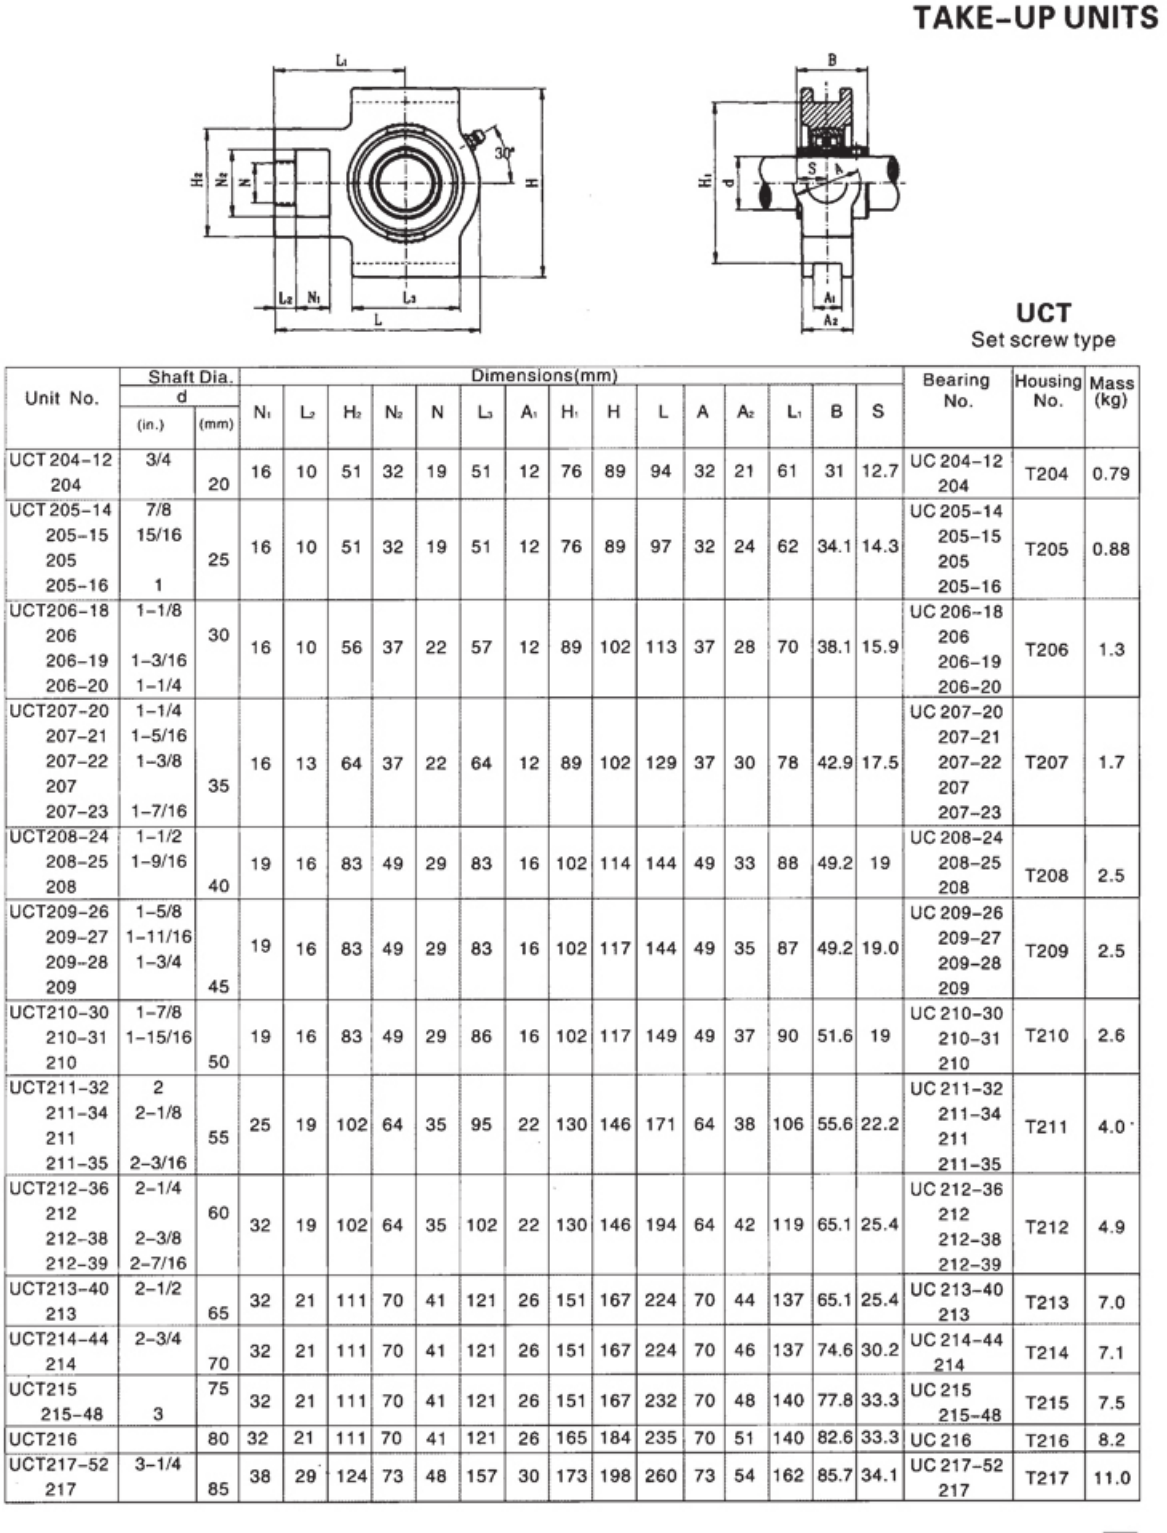
EP-UCT set-screw units are available with both metric and inch bore options. UCT is the natural starting family when the conveyor uses a UC-style insert and a conventional take-up frame. The frame dimensions and the housing’s guiding profile must be checked together; a correct shaft bore does not guarantee that the housing fits the channel.
NAT: eccentric-collar take-up concept
NAT-type take-up units provide the same adjustable housing function with an eccentric-collar shaft lock. This becomes relevant where the existing machine or duty calls for an eccentric locking method. Keep the collar, insert and take-up housing as a matched system during replacement.
UCK and UCST: compact or alternative frame formats
The planning range also includes UCK and UCST take-up families. Their purpose is still linear adjustment, but the housing geometry and duty level can differ. Identify the frame opening, housing width, adjustment screw arrangement and shaft line before substituting one take-up family for another.
Selection criteria
| Selection input | What to record |
|---|---|
| Shaft | Diameter, metric/inch, condition and locking method |
| Frame | Housing guide width/height and available travel |
| Conveyor | Head/tail/boot position, pulley or sprocket duty |
| Load | Radial load, shock, belt tension and starts/stops |
| Environment | Dust, moisture, temperature and grease access |
| Maintenance | Adjustment access and expected inspection practice |
Installing a take-up unit in the frame
Fit the housing into the guide without forcing it, install the shaft and establish both left and right bearing positions before final locking. Adjust both sides of a conveyor evenly so the pulley remains square to the belt. The take-up screw sets position; it should not be used to compensate for a bent shaft or a frame that is out of square.
After tension is set, lock the insert to the shaft using the procedure for its locking system and verify that the shaft rotates without binding across the adjustment range.
Take-up frame geometry is part of the bearing specification
A UCT-style housing must slide in a compatible frame. The buyer therefore needs more than shaft diameter: guide width, housing height, tension-screw arrangement and usable adjustment travel all matter. A unit can have the correct insert bore and still be unusable because the housing cannot enter or align in the existing take-up frame.
Selection by conveyor role
| Conveyor position | Housing function | Family to review |
|---|---|---|
| Fixed head / tail support | Holds shaft at fixed location | EP-UCP or flange family |
| Adjustable take-up | Moves to set belt / chain tension | EP-UCT / NAT / UCK / UCST family as frame requires |
| Screw-conveyor end plate | Face-mounted end support | EP-UCFC or flange family where geometry matches |
Installation after tensioning
Adjust both sides of a take-up shaft evenly and verify the pulley remains square to the conveyor. After the belt or chain reaches the required tension, recheck bearing alignment and housing position. A skewed take-up can create bearing load and tracking problems that cannot be solved by installing a larger insert.
Need a model checked against your machine? Send the dimensions with your RFQ.